School Embroidery Design: Practical Review for Real Projects
First Impressions: A Nostalgic, Clean Design with Broad Appeal
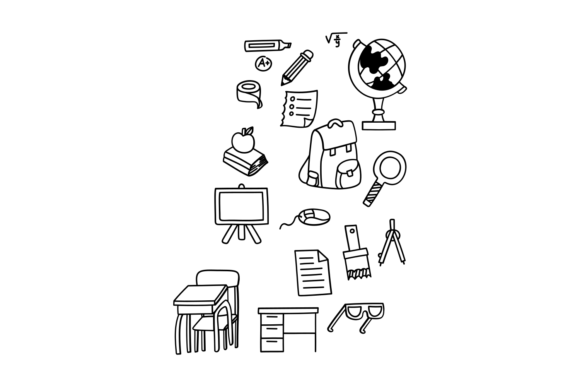
When I first opened the School embroidery design file, I was struck by its clean, slightly nostalgic aesthetic. It carries a classic schoolhouse theme with a modern twist—think chalkboards, books, and backpacks—but without feeling too literal or cartoonish. The layout is balanced, the shapes are crisp, and there's a nice balance between detail and simplicity. This makes it versatile for both children's items and more mature, boutique-style merchandise.
From a design standpoint, School reads as warm and inviting. It’s not overly busy, which means it won’t get lost on patterned fabric or when scaled down for smaller items. The visual personality leans toward playful yet professional—perfect for teachers, students, or anyone who appreciates back-to-school season.
Real-Life Use: Where School Really Shines
I tested the School design on a few different project types to see how it would hold up in real-world embroidery situations. Here’s what I found:
- Custom Tote Bags: Looks great centered on a cotton tote. The design’s moderate detail level stitched cleanly without pulling or distortion. A few small inner corners needed a little clean-up, but overall, it held up well.
- Sweatshirts & Hoodies: The thicker fabric handled the stitch density nicely. I used a medium-weight stabilizer and was pleased with the dimensional effect. The contrast between satin and fill stitches really popped on a navy hoodie.
- Baby Clothes: Worked surprisingly well on a onesie. I scaled it down a bit and simplified the inner details slightly to avoid crowding the small space. It gave a personalized, boutique feel without looking too busy.
- Embroidered Patches: Cut from felt and stitched using a satin border, the School design made a charming patch. It’s simple enough to look sharp when ironed onto a backpack or jacket.
It also translated well into digital mockups, especially when used in product listings on Etsy or craft marketplaces. The design has a strong visual identity that makes it instantly recognizable, which is a big plus for branding and product differentiation.
Where to Use School with Caution
While School is a solid design overall, there are a few scenarios where it needs careful handling:
- Small Hoop Sizes: If your machine has a limited hoop size, be sure to test the design at scale before stitching. Some of the smaller elements may get lost or stitch too tightly.
- Stretchy or Thin Fabrics: The stitch density in certain areas can cause puckering on delicate or stretchy materials. Using a lightweight cutaway stabilizer helped mitigate this issue.
- Dark Fabric Backgrounds: The light thread colors didn’t stand out as clearly as I’d hoped on black fabric. I ended up adding a small outline in a contrasting color to enhance visibility.
- Curved Surfaces (like caps): When I stitched it onto a baseball cap, the curvature distorted a few of the sharp corners slightly. Adjusting the placement and using a cap hoop helped, but it required a bit more setup time.
Visual Appeal and Customer Perception
One of the strongest points of the School design is how it affects buyer engagement. It has a strong thematic identity that speaks directly to a niche audience—parents, teachers, students, and educators. When I used it on a line of personalized back-to-school totes, customers responded positively, commenting on how “cute” and “on-trend” it looked.
From a design perspective, it enhances product value without overwhelming the item itself. It doesn’t scream “mass-produced,” which is essential for small shop owners and Etsy sellers trying to build trust with buyers. The clarity of the stitch work and the balance of satin and fill stitches make it look professionally done, even when stitched at home.
Designer Notes: What You Should Test Before Sewing
Here are a few practical steps I recommend before committing to a finished product using the School design:
- Test on Scrap Fabric: Always run a test stitch-out on the same fabric you plan to use. This helps catch any density issues or distortions early.
- Check Thread Color Contrast: Especially on dark or patterned backgrounds, ensure the thread colors stand out clearly.
- Confirm Hoop Size Compatibility: Don’t assume the design fits your hoop—preview it in your embroidery software first.
- Inspect Small Details: Zoom in on the digital preview to see if tiny letters or inner corners might get lost when stitched.
- Test in Mockups: Use black and white or color mockups to see how the design looks in different contexts before printing labels or product photos.
- Use Proper Stabilizer: Depending on the fabric, a medium-weight tear-away or cutaway stabilizer made a noticeable difference in stitch clarity.
- Review Licensing: If you're selling finished products or digital bundles, always confirm the license allows for commercial use.
Final Thoughts: A Dependable Design for Multiple Uses
Overall, the School embroidery design is a well-balanced, adaptable file that works across a wide range of projects. It holds up well in both personal and commercial embroidery work, and its nostalgic charm gives it broad appeal. Whether you're creating a boutique sweatshirt, a personalized baby bib, or a holiday-themed tote, this design brings a touch of personality without sacrificing professionalism.
For small business owners and Etsy sellers, it’s a smart addition to your design assets—especially during back-to-school season. Just remember to test, adjust, and adapt it thoughtfully to your specific project needs. Done right, School can elevate your product line and help your handmade items stand out in a crowded market.